Pages

Monday, December 27, 2010

Amazingly Delicious Cinnamon Rolls

Do you ever make something and look at the finished product shocked that you actually made it? That's how I was with these cinnamon rolls. My sister had asked me to make cinnamon rolls for Christmas morning several weeks ago, and I knew right where to go: The Pioneer Woman's blog. After all, with this being my first time making cinnamon rolls, I needed some step-by-step instruction and photos and Ree can be counted on to provide both.

The flavor - OMG. And I don't use those three little letters lightly. The dough came out so tender and light, the cinnamon/sugar/butter mixture swirled throughout was divine, and the icing was a delicious addition to this already amazing roll. Hallelujah!

My adjustments and comments on the original recipe include:
  • We ended up filling about 6 1/2 pans instead of the 7, but I also wasted some of the dough on the ends that didn't get enough cinnamony-goodness on it. I will not be wasting this precious dough next time.
  • I used King Arthur Flour Baker's Cinnamon Filling instead of the sugar/cinnamon combo in PW's recipe. I made just enough to be able to smear on a thin, uniform layer across the dough. And I found that working the butter actually into the Baker's Cinnamon Filling made it easier to roll and a bit less messy than just pouring the butter on top and trying to roll it up.
  • I refrigerated the dough overnight and it was very easy to roll out and work with.
  • We baked a couple pans immediately after cutting and rising for 25 minutes. Those are pictured below and were perfect.
  • I also froze a batch, let it defrost and rise on the counter overnight and they turned out beautiful and equally as perfect.
I'm pretty sure that these rolls have become a Christmas tradition, along with my sister's delicious Bacon and Mushroom Egg Bake. (That's another recipe that I will have to share. It's delish.) The cinnamon roll recipe is just below the pics... Make these! Then invite me over. I'll bring the coffee.

The cinnamon rolls just after cutting them and placing them in the pan. This batch went into the freezer to save for one of those mornings that just beg for a sweet treat.

My sweet nephew helped whisk the frosting.
Just out of the oven.

Per Ree's instructions, we coated our cinnamon rolls in her yummy maple frosting.
We also baked up a batch to give our neighbors on Christmas. When you have something this delicious, it should be shared.
Pioneer Woman's Cinnamon Rolls
For the step-by-step photos, click here. For FAQs on the cinnamon rolls, click here. Both are extremely helpful.

Ingredients

  • 1 quart Whole Milk
  • 1 cup Vegetable Oil
  • 1 cup Sugar
  • 2 packages Active Dry Yeast
  • 8 cups (Plus 1 Cup Extra, Separated) All-purpose Flour
  • 1 teaspoon (heaping) Baking Powder
  • 1 teaspoon (scant) Baking Soda
  • 1 Tablespoon (heaping) Salt
  • Plenty Of Melted Butter
  • 2 cups Sugar
  • Generous Sprinkling Of Cinnamon
MAPLE FROSTING:
  • 1 2-lb. bag Powdered Sugar
  • 2 teaspoons Maple Flavoring
  • ½ cups Milk
  • ¼ cups Melted Butter
  • ¼ cups Brewed Coffee
  • ⅛ teaspoons Salt

Mix the milk, vegetable oil and sugar in a pan. Scald the mixture (heat until just before the boiling point). Turn off heat and leave to cool 45 minutes to 1 hour. When the mixture is lukewarm to warm, but NOT hot, sprinkle in both packages of Active Dry Yeast. Let this sit for a minute. Then add 8 cups of all-purpose flour. Stir mixture together. Cover and let rise for at least an hour.

After rising for at least an hour, add 1 more cup of flour, the baking powder, baking soda and salt. Stir mixture together. (At this point, you could cover the dough and put it in the fridge until you need it – overnight or even a day or two, if necessary. Just keep your eye on it and if it starts to overflow out of the pan, just punch it down).

When ready to prepare rolls: Sprinkle rolling surface generously with flour. Take half the dough and form a rough rectangle. Then roll the dough thin, maintaining a general rectangular shape. Drizzle 1/2 to 1 cup melted butter over the dough. Now sprinkle 1 cup of sugar over the butter followed by a generous sprinkling of cinnamon.

Now, starting at the opposite end, begin rolling the dough in a neat line toward you. Keep the roll relatively tight as you go. Next, pinch the seam of the roll to seal it.

Spread 1 tablespoon of melted butter in a seven inch round foil cake or pie pan. Then begin cutting the rolls approximately ¾ to 1 inch thick and laying them in the buttered pans.

Repeat this process with the other half of the dough. Let the rolls rise for 20 to 30 minutes, then bake at 375 degrees until light golden brown, about 15 to 18 minutes.

For the frosting, mix together all ingredients listed and stir well until smooth. It should be thick but pourable. Taste and adjust as needed. Generously drizzle over the warm rolls. Go crazy and don’t skimp on the frosting.

Source: The Pioneer Woman

Friday, December 24, 2010

Nate's Fav: Swedish Meatballs and Mashed Potatoes

The year was 1999. It was my boyfriend's birthday and he lived on OSU campus about three hours from where he grew up. I wanted to make him something really special; something that would remind him of home and something that he loved. I stealthily got his parents' number and made an awkward call. I had only met them once before. The call went something like this:

Me - "Hi. This is Lynn. I'm the one dating your son, Nate, and since it's almost his birthday, I wanted to make him his favorite meal. He said it's your Swedish meatballs, mashed potatoes, and green beans. Could I get the recipe from you please?"
Nate's mom - "Hi Lynn. We just make meatballs with a little nutmeg added to them and make the gravy with cream of mushroom soup and water."
Me - "Uhhh, okay. Well, thanks! It was nice talking with you."
Nate's mom - "You too!"
Click.

And then I panicked.

How was I supposed to make my love's favorite meal without knowing the recipe?! I had never made meatballs before. What size should they be? What made them Swedish? Was his mom upset that I was trying to recreate her baby's favorite meal that she has always made for him? Is that why she was so vague with the recipe? I was a mess (in case you couldn't tell).

A couple minutes later, my cell phone rang. Nate's mom had called Nate to get my number after she thought about our conversation. Maybe she could hear the panic in my voice? She told me she realized maybe I actually needed the measurements and ingredients. I was beyond grateful for that second call. Actual recipe in hand, I was able to make my boyfriend a little homemade comfort food. Was it as good as his mom's? Not nearly, but you wouldn't have known it by his reaction.

In the 11 years since, this dish remains one of his all-time favorites. It's the ultimate comfort food. While it occasionally makes it to a week night dinner, it's usually reserved for special occasions. Nate's birthday was last week, and this was once again his requested meal. With the original recipe (modified only slightly) I was able to make him one heck of a dinner.

And the answer to what makes these Swedish? I still don't know, but I think it's a nice combination of the size of the meatball, the mushroom gravy, and maybe the addition of nutmeg. Whatever it is, it's good.
*Full recipes for the meatballs and mashed potatoes are at the bottom.*

In a medium bowl, combine bread crumbs, onion salt, parsley, pepper, nutmeg, and salt.

Measure out the milk, and to it add the Worcestershire sauce and an egg. I like to crack my egg in a separate bowl or measuring cup, just in case the egg is bad, or egg shells somehow make there way in.

Combine the wet ingredients into the dry ingredients and mix together with a fork. It looks kinda gross. Hang with me.

Add the ground beef to the bowl and combine thoroughly, but don't overwork the meat. This leads to tough meatballs. Roll out into balls the size of a walnut or so. I actually use the medium-sized Pampered Chef scope and it works quite well.

Add a little oil to your pan to help the meatballs get going. Start the water for your potatoes.

The meatballs start out round and pretty, but because I like to brown as much of the meatball as I can, they usually end up being moderately triangle-shaped when all is said and done. It's a personal preference. If you want to have pretty meatballs browned on only two sides, that's perfectly fine.

After the meatballs have cooked through, remove them from the pan to a paper towel-lined plate. Remove the excess oil from the pan. Don't be afraid of the brown deliciousness stuck to the bottom of the pan. With the help of some cream of mushroom soup and water, all these bits come right up and make the gravy extra delicious.

Add in a can of cream of mushroom soup and a can of water. Or if you make extra meatballs (like I did) or you have a gravy lover eating dinner (which I do), double it. Whisk it till it's combined. For years I tried to do this while the meatballs were still in the pan, but it's so much easier if the meatballs are added in after.

Add the meatballs back into the pan and top with some freshly grated nutmeg. A microplane grater does this job effortlessly.

As the gravy finishes thickening, drain 2 lb. of cooked potatoes.

In a microwave safe bowl, combine milk and butter and heat until the butter has melted. Add it, along with salt and pepper, to the potatoes and mash to desired consistency.

A plate of pure comfort, Nate-style.

Swedish Meatballs
Serves 3-4
Ingredients:

Meatballs

  • 1 lb. ground beef
  • 1/2 t. onion powder
  • scant 3/4 c. bread crumbs
  • 1 Tbsp. minced dried parsley
  • 1 1/2 tsp. salt
  • 1/8 tsp. pepper
  • 1 tsp. Worcestershire sauce
  • 1 egg
  • 1/2 c. milk
  • 1/2 tsp. nutmeg
  • Vegetable oil for pan
Gravy
  • 1 can Campbell's Cream of Mushroom Soup
  • 1 can water
In a medium bowl, combine the onion powder, bread crumbs, parsley, nutmeg, salt, and pepper. In a separate bowl, combine the milk, Worcestershire sauce, and egg. Add to the dry ingredients and stir with a fork until incorporated. Add in meat and combine with clean hands. Mix just until incorporated. Using your hand or a scoop, form the meat into a ball about the size of a walnut.

In a large skillet over medium heat, add enough oil to just cover the bottom of the pan. After the oil is hot, carefully place meatballs in the skillet, browning the meat on each side and cooking till no longer pink. Remove to a paper towel-lined plate.

After all meatballs have cooked and been removed from the pan, drain the excess oil out of the pan and place it back on the burner, being careful that there is no grease on the side or bottom of the pan. Add the cream of mushroom soup(s) and water to the pan and use a whisk to combine and pick up the tasty bits on the bottom of the pan. Add the meatballs back to the pan, and add a lg. pinch of nutmeg over the meatballs and gravy. Stir and cook until the gravy reaches the desired consistency.

Source: Nate's mom

Perfect Mashed Potatoes
Serves 4-6
Ingredients:
  • 2 pounds russet, Yukon gold, or long white potatoes
  • 1 tablespoon salt, plus more to taste
  • 1 cup milk, or cream
  • 4 tablespoons unsalted butter
  • 1/4 teaspoon freshly ground black pepper
Peel and cut potatoes into 1 1/2-inch-thick slices. Place in a medium saucepan. Cover with cold water; add 1 tablespoon salt. bring to a simmer.  Keep potatoes at a low simmer until a knife slips in and out easily. Drain potatoes in a colander and return to saucepan off the heat.
Place milk and butter in a microwave safe dish and warm until the butter has melted, about 2 minutes. Add the milk/butter mixture, salt, and pepper to the potatoes and mash with a potato masher to desired consistency.


Wednesday, December 22, 2010

Homemade Applesauce

While every year we buy an obscene amount of apples from Lynd's Fruit Farm and my girls love applesauce, I had never actually bought apples with the intention to make applesauce until a week ago. What took me so long?? Homemade applesauce is so easy. You peel and chop some apples, throw it in a pot with some sugar and cinnamon, then mash it when the apples are tender and you have applesauce.

Start out with a bunch of apples. The recipe I used calls for 4 apples, but I three-times-ed the ingredients (thriced-it?!). The apples I used were the Jonathan variety. Peel and large dice them.

Add about 3/4 c. of water, 1/4 c. sugar and 1/2 tsp. of cinnamon for every 4 apples you use. I will scale back the sugar by about half next time as it was much sweeter than the girls are used to eating and I don't think it needed quite that much sugar.

Cook covered at medium heat for 20-25 minutes, or until the apples are tender.

Let cool, then mash till you reach your desired consistency. Feed it to your kids and watch them swoon. It happened in my home. It could happen in yours. This will last in the fridge for a couple days, so if you thrice your recipe like I did, share it with some friends or put it in the freezer to save for another day. Pork chops, anyone?

Homemade Applesauce

  • 4 apples - peeled, cored and chopped
  • 3/4 cup water
  • 1/4 cup white sugar
  • 1/2 teaspoon ground cinnamon
In a saucepan, combine apples, water, sugar, and cinnamon. Cover, and cook over medium heat for 15 to 20 minutes, or until apples are soft. Allow to cool, then mash with a fork or potato masher.

Source: Allrecipes.com Sarah's Applesauce

Tuesday, December 21, 2010

Chicken Noodle Soup

We're still on the sick side, but definitely on the mend. Three out of the four of us have been on antibiotics over the last two weeks. Maybe this means that we'll be in the clear for Christmas?! Fingers crossed.

We've made a number of soups, but the classic soup when recovering from a cold or flu is good ol' Chicken Noodle. Some scientists even believe they have proved that chicken noodle soup is actually medicinal. Whether it actually is healing or not, it tastes good, and warms the belly, so I'm all for it.

The recipe that inspired me comes from smells like home and is a very traditional recipe for chicken noodle soup. Traditional and tasty. Next time, I'll chop up and wilt some onions with the carrots and celery, but that's really the only change I'll make. I also used a rotisserie chicken to make short work of the prep, which I highly recommend. Enjoy this tasty soup!


Classic Chicken Noodle Soup
  • 2 Tbsp. extra virgin olive oil
  • 1 cup medium-diced celery (2 stalks)
  • 1 cup medium-diced carrots (3 carrots)
  • 3/4 tsp. Kosher salt
  • 1/2 tsp. freshly ground black pepper
  • 2 quarts homemade or store-bought chicken stock 
  • 2 cups wide egg noodles
  • 2-3 cups cooked shredded chicken (store bought Rotisserie chicken worked perfectly)
  • 1/4 cup chopped fresh parsley

Heat oil in a large pot or dutch oven over medium-high heat.  Add the celery, carrots, salt, and pepper and cook for 10-12 minutes until softened.  Pour in the stock, bring to a boil over high heat, and add the noodles.  Cook the noodles for 10 minutes, then add the chicken and parsley.  Allow the chicken to heat through.  Serve hot.

Source: Smells Like Home

Friday, December 17, 2010

Sugar Cookies with Royal Icing


Let me start off this post by stating that I have really only ever used a piping bag maybe five times ever. But after seeing Annie's step-by-step royal icing tutorial, I felt up to the challenge. Her cookies are so pretty. She also has a sugar cookie that is well reviewed and very simple to put together. And I'm an all or nothing kinda girl (just ask my hubby), so I figured I'd follow her advice from start to finish.

As she promised, the cookie dough was super easy to work with, and the cookies held their shape beautifully, even with all the butter in the dough. 

I'm a big believer in Silpat baking mats. They are awesome for making cookies and dealing with anything that is traditionally super sticky. The cookies literally just slide right off.

After making three trays of cutouts, I had just a tiny scrap of dough left. In the past when making sugar cookies, the dough is usually too stiff from being floured or just not workable after being rolled out so many times, but not this dough.

After cooling the cookies completely, I made the royal icing. (Recipe below)

A quick outline of a very stiff royal icing helps the "flooding" process later. Here's where Annie's step-by-step royal icing guide really came in handy.

Once the piped outline had dried, you can begin flooding. I followed Annie's advice and used two Wilton's plastic bottles to squeeze the icing onto the cookie, then spread the icing with toothpicks.

By flooding only specific sections at a time, I was able to decorate with the different colors of sanding sugar.

I also saved my original piping bags, so I added a little extra decoration to the top of the cookies after the flooded icing had dried.

My sister remembered that I had these cute little ball decorations which make lovely edible ornaments.

Are they perfect? No. But I am so happy with how they turned out! Especially with my limited piping experience. And can I tell you, they taste delish. Even if you're not into trying royal icing, definitely give these sugar cookies a try. Now I need to get them out of my house so I don't keep "trying" them.

Ella’s White Sugar Cookies
Yields: ~40 cookies
Ingredients:
1 cup butter
1 cup powdered sugar
1 egg, beaten
1 ½ t. almond extract
1 t. vanilla
1 t. salt
2 ½ c. sifted flour

Cream butter. Add powdered sugar. Blend in egg, almond extract, vanilla, salt and flour. Chill dough until firm. Roll to ¼” thickness on well-floured surface. Cut with cookie cutters. Place on greased cookie sheets. Bake at 375° for 8-10 min. Cookies should not brown. Frost and decorate when cool.

Source: Annie's Eats

Royal Icing

*For Annie's how-to with Royal Icing, click here.*
Ingredients:
4 cups powdered sugar, sifted
2 tbsp. meringue powder
5 tbsp. water

Combine all ingredients in the bowl of a stand mixer fitted with the paddle attachment.  Mix on low speed until the sheen has disappeared and the icing has a matte appearance (about 7-10 minutes).  Transfer the contents of the mixing bowl to an air-tight container.  This will be the stiffest consistency of the icing, and at this point it is still too stiff to use for decorating.  Add water a very small amount at a time and stir by hand until fully incorporated.  Continue until the icing has reached a consistency appropriate for piping.  (Remember, if you are having any difficulty piping, it is still too thick.  Add a little more liquid and try again.)  Using a pastry bag, pipe around the edges of each cookie.  Let stand so the icing will set.  Make sure to keep the leftover icing covered at all times when not in use so that it does not begin to harden.

Once all the cookies have been edged, transfer some of the remaining icing to a separate air-tight container.  Thin out by incorporating a small amount of water at a time, until the icing drips off the spoon easily when lifted and then smooths in with that still in the bowl.  If you go too far and the icing is too thin, add more sifted powdered sugar to thicken it again.  Once the icing has reached the desired consistency, transfer it to a squeeze bottle (or a plastic bag with a hole in one corner), and flood the area surrounded by the piping on each cookie.  If it does not completely spread to the edges, use a toothpick to help it along.  Allow to set.
Use the remaining thicker icing for piping decoration as desired.  Gel icing color is best as it does not add a significant amount of liquid.  Liquid food coloring can be used as well – add powdered sugar as needed to compensate for any thinning that occurs.

Source: Annie's Eats

Monday, December 13, 2010

Cheesy Potato Soup


I've been on a bit of a soup kick as of late. The colder it gets, the more appealing a big, hot bowl of soup sounds. I have had this recipe marked to try for almost a year now, but life got in the way, then the weather warmed up. I'm glad it finally got chilly enough for me to give in and make this a priority.

The first thing I noticed about this soup is that it has no processed cheese in it. Don't get me wrong; there is a time and place for Velveeta. But I try not to eat it unless it's in a cheese dip and there are chips. A bit of a double standard, maybe, but I'm complicated like that. So the fact that the cheese is all cheddar was an instant win for this soup as far as I was concerned.

The recipe also gives a 40 minute total cook time, which it pretty much delivered on. I started dinner at 4:45 and the soup was ready at 5:30. Another win.

How did it taste, you may wonder? In a word: delicious. Want to make it for yourself? Here's how: (full recipe below)

Peel 4-5 medium carrots.
Melt 1 Tbsp. butter in your medium to large stockpot. If this looks like a big tablespoon to you, you would be right. I did not read all the way through the recipe (hanging head in shame) and put almost all the butter the recipe calls for instead of just the 1 Tbsp. I was supposed to use. Oi vey. It still worked out just fine as I scaled back a Tbsp. in the roux later, but I could have gone without the extra fat/calories.

Dice 1 c. of the peeled carrots. Toss them into the melted butter and saute until softened.

Peel and cube about 4 medium russet potatoes, or enough to get to 5 cups.

Add 4 c. chicken broth, the potatoes, basil, salt and pepper to the pot. Stir, bring to a boil, then reduce heat. In the meantime, start working on the cheese sauce.

Make a roux by adding 1/4 c. flour to 3 Tbsp. of melted butter. Cook for about 1 minute. Then slowly whisk in 1 1/2 c. milk and cooked until slightly thickened. 

Shred up about 2 c. of delicious sharp cheddar cheese.

Add the cheese to the butter/flour/milk mixture. Stir until the cheese is melted and thoroughly combined.

I could throw this on a big bowl of broccoli and be perfectly content.

Check potatoes. If they are tender, add the cheese sauce and stir until thoroughly blended.

It's almost soup.

The recipe doesn't call for it, but I feel no potato soup is complete without some chopped green onions and some crispy bacon. I didn't have any bacon, but I did have some left over prosciutto that I cooked till crispy. It was a wonderfully perfect for this chilly night.  
Cheesy Potato Soup
Serves 4-5
Ingredients
  • 4 Tbsp. butter (1/2 stick)
  • 1 c. diced carrots (1/4-inch dice)
  • 4 c. chicken broth (1 32-ounce carton)
  • 5 c. peeled and cubed russet potatoes (about 4 medium; 1/2-inch cube)
  • 1 tsp. dried basil
  • 1/4 tsp. salt (or more to taste)
  • 1/8 tsp. ground black pepper (or more to taste)
  • 1/4 c. all-purpose flour
  • 1 1/2 c. milk (lowfat or whole)
  • 8 oz. sharp Cheddar cheese, grated (2 c.)
Make the soup: Melt 1 Tbsp. of the butter in a large stockpot over medium-high heat. Add the carrots and saute until softened - 3 to 4 minutes. Add the broth, potatoes, basil, salt, and pepper. Bring to a boil; lower the heat and simmer until the potatoes are tender - about 20 minutes.

Make the cheese sauce: Meanwhile, melt the remaining 3 Tbsp. butter in a medium-sized saucepan over medium-high heat. Stir in the flour and cook for 1 minute. Slowly whisk in the milk and cook until slightly thickened - 2 minutes. Add the cheese and stir until melted and thoroughly combined. Gradually pour the sauce into the soup and stir until thoroughly blended. Serve.

Suggested toppings: green onions, crispy bacon or prosciutto.

Source: The Farm Chicks in the Kitchen

Pomegranate Cosmos

Maybe you have had one of those days where you come home (or you've never left home) and need want a stiff drink. Or maybe you just want something you can sip as you sit and chat with good friends. This is your drink. It is as tasty as it is STRONG. Ina does not mess around. Maybe this is why she has so many friends and they all look so jovial on her show. They've been drinking Pomegranate Cosmopolitans. I knew it couldn't be that they all just loved living in the Hamptons that much.

In all seriousness, this drink is delicious, and you can always adjust the alcohol content to suit your tastes. We used Ocean Spray 100% Juice Cranberry Juice, which is not as sweet as it's HFCS (High Fructose Corn Syrup) counterpart, but it just made the drink a little more tart than it would otherwise have. But really, the star of the show here is the vodka, so don't skimp out on a cheap (or worse, distilled) brand. Get the good stuff. You're worth it. And this wouldn't be as stiff or tasty without it.

Pomegranate Cosmopolitans
Serves 6
  • 2 cups good vodka (Ina recommends: Grey Goose or Finlandia)
  • 1 cup orange liqueur (Ina recommends: Cointreau, but we used Grand Marnier)
  • 1 cup cranberry juice cocktail, (recommended: Ocean Spray)
  • 1/2 cup bottled pomegranate juice (recommended: Pom Wonderful)
  • 1/2 cup freshly squeezed lime juice (4 limes)
  • Thinly sliced limes, for garnish

Combine the vodka, orange liqueur, cranberry juice, pomegranate juice, and lime juice in a large pitcher. Fill a cocktail shaker half full with ice, pour the cocktail mixture in, and shake for a full 30 seconds. Pour into martini glasses, garnish with a slice of lime, and serve immediately.

Source: Ina Garten's Back to Basics Cookbook

Friday, December 10, 2010

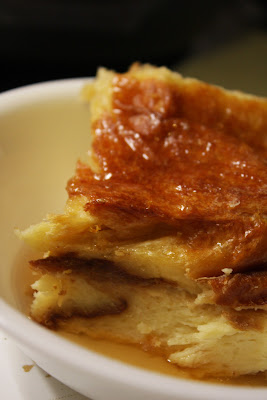
Challah! French Toast Bread Pudding


Breakfast for dinner is always a winner in our house and we do it pretty often. I had picked up a loaf of challah bread on the last farm market day of the season, and had been saving it (in the freezer) for just the perfect occasion.

A couple good friends were coming over for dinner and I wanted to make something that wouldn't leave me doing prep work the whole time they was here, but would also taste yummy. Ina Garten's French Toast Bread Pudding seemed to fit the bill perfectly.

A couple recommendations:
  • Make sure you have a large loaf of challah. Mine was over a foot and a half long and it was perfect for the 9" x 13" pan.
  • Toast the bread if it isn't stale at 350ยบ for 10 minutes. It really helps prep the bread to absorb all the custard. Mmmm.... custard.
  • Cram your bread into the pan so there isn't any big spaces. If your bread pieces are too big, just cut them to size. 
  • A roasting pan is necessary for this recipe. The french toast bread pudding gets really puffy while it cooks under the foil, and if the pan isn't taller than your 9" x 13" is, bad things could happen.
  • Don't skip or skimp on the orange zest. It really makes this dish something special. 
  • Plan ahead. This takes an hour and a half to bake.
  • Next time I will warm my syrup, or make a fruity syrup to top it with. A favorite in our house is to heat pure maple syrup and frozen blueberries on the stove top for about 10 minutes. You get the little bonus nutrition from the blueberries with a great tasting syrup.
  • While it's baking, use that time to make a yummy cocktail to go with it. I'll be sharing the yummy cosmo we made tomorrow. It's a keeper.
French Toast Bread Pudding
Serves: 8

Ingredients
  • 1 large (or 2 small) challah loaf, sliced 3/4 inch thick
  • 8 extra-large eggs (I used large with no issues)
  • 5 cups half-and-half or milk (I used 2 cups of heavy cream and 3 cups of 1% milk)
  • 3 Tbsp. honey
  • 1 Tbsp. grated orange zest
  • 1 Tsp pure vanilla extract
  • 1/4 Tsp kosher salt
  • Confectioners’ sugar and pure maple syrup, for serving
Preheat oven to 350 degrees.

Arrange the bread in two layers in a 9 x 13 x 2 inch baking dish, cutting the bread to fit the dish. Set aside.

In a large bowl, whisk together the eggs, half-and-half (or milk/cream), honey, orange zest, vanilla, and salt. Pour the mixture over the bread and press the bread down. Allow to soak for 10 minutes.

Place the baking dish in a larger roasting pan and add enough very hot tap water to the roasting pan to come an inch up the side of the baking dish. Cover the roasting pan tightly with aluminum foil, tenting it so the foil doesn’t touch the pudding. Make two slashes in the foil to allow steam to escape. Bake for 45 minutes, remove the aluminum foil, and bake for another 45 minutes, until the pudding puffs up and the custard is set. Remove from oven and cool slightly.

With a small sieve, dust lightly with confectioners’ sugar and serve hot in squares with maple syrup on the side.

Source: Ina Garten's How Easy is That? Cookbook